Friday, August 27, 2021

Scrapping Clearly DT - Just Married

 Hello Scrapping Clearly fans!


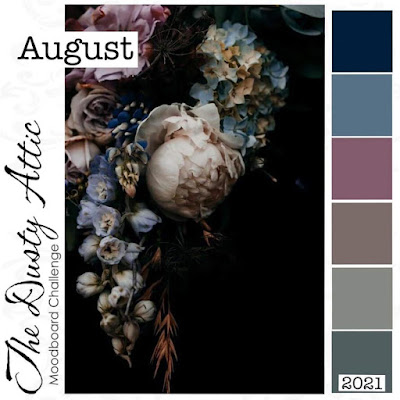
It's my turn on the blog today and I am sharing a layout I created for Scrapping Clearly inspired by the August Mood Board.


Here's a peek at the mood board:

To start my layout, I mounted a cropped sheet of Vicki Boutin Mixed Media Art Paper onto some patterned paper from my stash. I spritzed some water onto the page and then dropped in some Colour Blast Colour Artist Ink in Berry. I used a soft paintbrush to spread the ink around a little and then flicked some of the colour over the page with the paintbrush. I dried the page completely with a heat gun before the next step.


I spritzed some Dylusions Ink Spray in Crushed Grape onto my craft sheet, added a little water and then swiped a Vicki Boutin stencil through the colour. I then 'stamped' the stencil onto the page. I repeated this process until I was happy with the amount of 'stamping'.


I added some more stamping, this time using actual stamps from the Heidi Swapp Always Mini Stamp Set with Tim Holtz Seedless Preserves Distress Oxide and Dusty Concord Distress Ink.


I layered my patterned papers and Heidi Swapp 6x6 Die-cut papers together to create a stack under my photo and added that to the page.


I added a bunch of embellishments and my title  as well as a little more stamping to finish.


Products used:

VICKI BOUTIN Mixed Media Art Paper
VICKI BOUTIN stencil
COCOA VANILLA STUDIO Midnight Die-cuts
COLOUR BLAST Colour Artist Ink Berry
TIM HOLTZ Distress Ink Dusty Concord
DUSTY ATTIC Chipboard
UNI Posca Pen Black

Thanks for stopping by the blog today. I hope you find some time to play along with the mood board challenge too.

Cheers
Belinda


Sunday, August 22, 2021

Bee Arty DT - Shine Bright

 Hello Bee Arty fans!!


It's Belinda with you today to share my latest layout for Bee Arty featuring the awesome NEW Electric Dreams Mini Collection.


I just love the vibrant colours in the paper collection as well as all of the funky fluro mixed media products.

For this layout, I first mixed up some Fluro Yellow Mica Powder with distilled water in a mini mister. I used one of the fabulous craft powder spoons to scoop some of the mica powder into the mini mister, added the water and then shook it up until all of the powder was incorporated. Next I spritzed it liberally over my page.


Once the layout was dry, I then added some stencilling using the Grungy Splat A5 Stencil and the Fluro Orange, Pink and Yellow Colour Pastes.


I added some stamping using the Going My Way Clear Stamp Set and Jet Black Archival Ink. I added a photo stack using some of the patterned papers from the collection under my photo.


I fussy cut some of the plus signs from a sheet of patterned paper in the collection and added those to the layout too.


I stamped some stars on the layout using star stamps from the same stamp set and Hero Arts Neon Inks.


I also stamped some of the stars onto extra 350gsm White Cardstock, fussy cut and added to the layout along with a couple of Charm's Creations Fluro embellishments.


Finally I added some quotes cut from the patterned paper.


Thanks for stopping by the blog today. I hope you are loving all of the fabulous fluro products as much as I am.

Cheers
Belinda


The Dusty Attic DT - Brave

 Hello Dusty Attic fans!


It's Belinda here today to share my latest layout for The Dusty Attic inspired by the August Mood Board and featuring some fabulous chipboard.


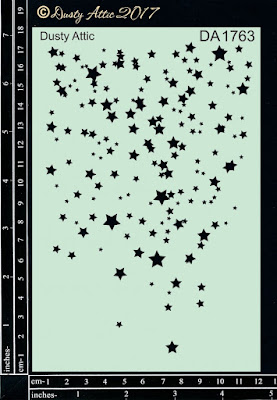
For this layout, I started with some pretty stunning patterned paper by Stamperia that really didn't need much altering. I sprayed some Navy Heidi Swapp Colour Shine in the centre and dried off with a heat gun. I then added some stencilling using both the Confetti # 2 and Starry Night Stencils with Colour Blast Colour Pastes.


I painted all of my chipboard pieces with 3 coats of heavy white gesso before painting some of the pieces with a grey acrylic paint.


I used the Cosmic Swirl chipboard as the base and then layered everything else on top.


I love the way you can layer the sun and clouds together. 


I scattered some sweet Stars across the page too. Stars would have to be my favourite element for just about everything.


I love the title and the quote from the patterned paper range I used. So perfect for my brave boy.


The Dusty Attic products used:


Thanks so much for stopping by the blog today. I hope you find some time to play along with the mood board this month too.

Cheers
Belinda


Monday, August 16, 2021

The Dusty Attic DT - In The Garden

 Hello Dusty Attic fans.


It's Belinda here with you today to share my latest layout for The Dusty Attic featuring some of the more newer chipboard pieces.


For this layout, I began by adding some colour ink to my heavy weight smooth white cardstock. I spritzed it with water and then placed some plastic packaging over the top to spread the colour out. I dried the page with a heat gun and then used a stamping with a stencil technique to add the pattern. I spritzed some green Dylusions Spray Ink onto the plastic packaging, swiped my stencil through it and then stamped the stencil onto the layout. I dried the page again and added some stamping using a garden inspired background stamp.


I painted all of my chipboard pieces with heavy white gesso and added the gorgeous Botanical Ringlet to the page.


I coloured the rest of the chipboard pieces using Posca Paint Pens. I love these pens so much for mess free altering of chipoard not to mention for art journalling. Who's got time for cleaning brushes?!! I would rather be making more art than cleaning up!!


And here is my completed layout:


The Dusty Attic products used:


Thanks so much for stopping by the blog today. I hope you feel inspired to have a play with your Dusty Attic chipboard too.

Cheers
Belinda


Friday, August 13, 2021

Scrapping Clearly DT - Fabulous

 Happy Friday the 13th Scrapping Clearly fans!!


It's Belinda here today to share my latest layout created for Scrapping Clearly featuring lots of awesome product from the store.


For this layout I have used the stunning Colour Study collection by Vicki Boutin. I love the beautikful bold and bright colours in this range. Here I have stuck mostly to the lemon and lime coloured patterned papers and embellishments.

I started my layout by adding Colour Blast Colour Inks in Citrus and Lime to my page. I spritzed with a little water and then placed a piece of plastic packaging over the top to spread the colour out. I dried it off with a heat gun before moving on to the stencilling. 


I applied some of the Lime Colour Ink to the piece of plastic packaging and swiped a stencil through it. I then stamped the stencil onto the layout. I did this a few times until I was happy with the coverage. I completely dried the page with a heat gun and thenadding some stamping. I used various stamps from the Darkroom Door Number Medley Rubber Stamp Set along with Tim Holtz Twisted Citron Distress Oxide.


I added my photo on a layered stack of co-ordinating patterned papers from the range as well as all of the embellishments scattered across the page in a somewhat random way. 


I used the Stamps from the Colour Study range to create some embellishments. I stamped them onto the same papers as the photo stack and then fussy cut.


I fussy cut some pretty butterflies from a Scrap FX Transparency sheet too.


VICKI BOUTIN Colour Study:
VICKI BOUTIN White Foundations Mixed Media Art Paper
VICKI BOUTIN Stencil


COLOUR BLAST Colour Ink:
- Citrus
- Lime

Thanks for stopping by the blog today. I hope you get a chance to have a play with your Scrapping Clearly goodies too.

Cheers
Belinda


Tuesday, August 10, 2021

Darkroom Door DT - Journal Blocks & Creative Quotes Postcards

 Hello Darkroom Door fans!

I am back to share with you a junk journal I created for Darkroom Door featuring both the BRAND NEW Journal Blocks Medium Stencil and the Creative Quotes Postcards.

I had so much fun creating this project that it was hard to stop adding more and more to it. I still have pages to complete so I will keep adding here and there. I used so many different Darkroom Door products in my book that I will let the photos speak for themselves and add the list of products at the end.

'Be Creative' Junk Journal


I created this junk journal using an envelope for the cover. For the pages I used scrapbooking paper, watercolour paper, tags, pages torn from a colouring book, bookpaper, leftover gel press prints and a glassine envelope. I added way too many pages as it made the journal really chunky but I kind of like it like that.

I added a postcard from the Enchanted Doors Postcard Set on the cover and fussy cut the title as well as stars and words from stamped images.


Inside the front cover I added some patterned paper and then swiped some gesso over an area to add the stamped quote. I finished with some fussy cut stamped butterflies and a messy freehand border using a Micron 04 pen.


I created a tag to go inside the envelope and used the Journal Blocks Medium Stencil with a black journaling pen to add journaling lines to the tag. I then added my own creativity rules that I live by.


On the facing page I cut a circle to reveal the image on the postcard below. I used a small leaf stamp to create a wreath around the circle. I stamped the first round of leaves and then created masks from very thin paper to place over the top of this round. I then stamped the next layer of leaves before removing the mask leaves. I coloured the leaves using coloured pencils. I added journaling lines again and handwrote a quote. I googled a whole bunch of creativity quotes that I added throughout this journal. I finished by stamping some tiny stars and adding white dots with a paint pen.


For this spread, I chose one of the gorgeous Creative Quotes Postcards and tried to match the other page to it.


I used similar colours to the postcard on my page and added journaling lines on top. I added one of the found creativity quotes in the journaling area and then decorated with fussy cut stamped images.


I stamped 'creativity' again on white cardstock using coloured ink, cut the letters out and added on top of the original version on the postcard. I added some mark making  using Posca Paint Pens and finished with a butterfly.


This next spread was such a fun one to create. It really tested my paint mixing skills as I mixed acrylic paints to match the original postcard on the right hand side. I actually hate mixing paint. I would rather use already mixed paint straight from the tube so this was a challenge. I did actually enjoy the challenge and love the way this spread turned out. It is simple yet striking.


The patterned paper I used on this page was a very similar colour to the lines on the postcard which is what gave me the idea to try to paint it the same as the postcard. I used the Sunshine Small Stencil with my mixed acrylic paints. Once dry, I simply added doodling with a black journaling pen to mimic the patterns on the postcard. 


I finished both pages with some fussy cut stamped stars and butterflies as well as a quote.


The next two pages were book paper and a page torn from a colouring book that I think I had cleaned a brayer on or used up leftover acrylic paint on. I stencilled and stamped some tropical leaves on the pages as well as some dots. I added journaling lines this time by sponging heavy white gesso over the Journal Blocks Medium Stencil. 


I added one of the quotes I found forgetting that it was already on the first postcard I used!! D'oh!! Oh well. It's a good quote and something that should be remembered. 


Inside the glassine envelop is a tiny little botany book that I made from bookpaper and Darkroom Door stamps. I will share that another day though as there are so many photos in this post already!!


Here's another spread where I have tried to match my page as closely as I can to the beautiful postcard. I carried my mark making across both pages to tie them together and also added fussy cut stamped images over both pages.


And here we are at the centre of my junk journal. I am a bit addicted to the BRAND NEW Tropical Leaves Large Stencil right now so I created a background using those. Every day literally is art day at my house so that was what guided this spread.


I stamped the Seven Days Eclectic Stamp on smooth white cardstock and cut out each day individually. I then stamped 'art' using the Alphabet Medley set and cut those out too. I crossed out the start of each day and added 'art' on top. I probably should have taken a little bit more care with the placement for Thursday as it looks like it is 'Tartsday'. I can assure you I definitely do not have a 'tartsday' at my house each week!!! LOL


I used the dashed lines on the Journal Blocks Stencil with a white Posca Paint Pen to create the dashed border around the pages.


And here we have another beautiful postcard and my attempt at matching a page to it. I used an actual tag and coloured it with ink similar to the tag image on the postcard.


I added stencilling and an extra quote to the postcard as well as some fussy cut stamped stars.


I added the curvy journaling block to my page this time using a black journaling pen and added another quote that I found on the internet. I absolutely love that quote and it is definitely true for me. I love sitting at my desk creating and forgetting about all of the worries and stresses of life.


This is a pretty simple spread. I used a piece of bookpaper that I had used to soak up some excess ink. The ink just happened to match the postcard on the facing page.


The other side of the glassine envelop sat here between the pages so I filled it with gold sequins, sealed it at the top with a stamped and fussy cut label and decorated the outside with stamped and fussy cut stars.


And we have made it to the last two pages completed in my junk journal. You have done well if you have stuck with me this far!! Thank you!!


This is my page created with matching colours and design to the postcard. I added journaling lines again with a black pen and added a quote I love by Napoleon Bonaparte.


I only added very minimal stamping to this postcard to tie the two pages together.


Most of what I used can be found in the list below with links to the website. I may have missed a thing or two. I used a LOT of awesome Darkroom Door products because they are so good and I hate limits.


Thanks so much for stopping by my blog today. Don't forget to check out the Darkroom Door Blog HERE for lots more inspiration.

Cheers
Belinda